Introduction: Bringing EFI to Small Engines
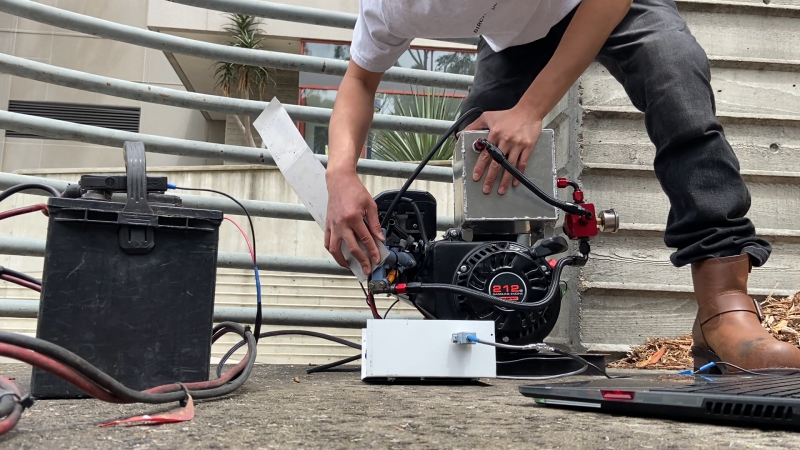
Small internal combustion engines have traditionally relied on carburetors to mix air and fuel, but a new wave of hobbyists is showing that even tiny powerplants can benefit from modern electronic fuel injection (EFI). One such project, undertaken by Carlos Takeshita, transforms a common Predator 212 engine—often found at Harbor Freight—into a fully electronic fuel-injected unit. This upgrade not only improves efficiency and throttle response but also offers a deep dive into engine management fundamentals.

Core Components of the EFI System
The conversion involves several key hardware additions that replace the original carburetor and ignition setup. Each component plays a crucial role in precisely metering fuel and timing combustion.
Crank Position Sensing: The Missing Tooth Trigger Wheel
A critical part of any EFI system is knowing exactly where the crankshaft is in its rotation. To achieve this, [Carlos] installed a missing tooth trigger wheel. This toothed wheel, mounted on the crankshaft, has one or more teeth removed to create a unique reference point. A Hall effect sensor reads the passing teeth and sends pulses to the engine control unit (ECU). When the missing tooth passes by, the ECU detects a longer gap and synchronizes its timing calculations. This setup allows the system to know both engine speed and crank angle with high accuracy.
Fuel Delivery: Custom Fuel Cell and High-Pressure Pump
Carburetors rely on atmospheric pressure to draw fuel, but EFI requires a consistent high-pressure supply. [Carlos] fabricated a custom aluminium fuel cell to hold gasoline. A high-pressure fuel pump draws fuel from the tank and pushes it through a regulator that maintains a constant pressure—often in the range of 30–60 psi for port injection. The fuel then travels to a single fuel injector mounted in a custom intake manifold. This injector sprays fuel directly into the airstream based on signals from the ECU.
Engine Control: Teensy 4.0 and Sensor Integration
The brain of the operation is a Teensy 4.0 microcontroller, which is small but powerful enough to handle real-time calculations. It receives data from a manifold air pressure (MAP) sensor and the crank position sensor. The MAP sensor measures the vacuum inside the intake manifold, which correlates to engine load. By combining load (from MAP) and speed (from the trigger wheel), the Teensy determines the optimal injection pulse width—how long the injector stays open—to deliver the correct amount of fuel. The code, available on GitHub, includes the logic for startup enrichment, acceleration compensation, and other tuning parameters.
The EFI Conversion Process: Step by Step
While the original article provides a high-level overview, converting a carbureted small engine to EFI involves several detailed stages. Below we outline the general workflow for such a project.
1. Engine Preparation
Start with a robust engine like the Predator 212. Remove the carburetor, intake manifold, and mechanical governor if present. Clean the engine block and inspect the crankshaft for a suitable mounting point for the trigger wheel. You may need to machine a spacer or adapter plate to attach the wheel securely.
2. Trigger Wheel and Sensor Mounting
Weld or bolt the missing tooth trigger wheel to the crankshaft or flywheel. Ensure it is concentric and balanced. Install the Hall effect sensor on a bracket so that it faces the teeth with a small air gap (typically 0.5–1.5 mm). Wire the sensor to the Teensy, following the schematic from the project files.
3. Fabricating the Fuel System
Build or buy a fuel cell that can withstand the pressure. Use a high-pressure EFI pump, an inline filter, and a return-style regulator. The injector requires a custom intake manifold—machined from aluminium or adapted from a similar engine. Connect the injector to the fuel rail and install a fuel pressure sensor (optional but helpful for tuning).
4. ECU and Sensor Wiring
Wire the aspx!MAP sensor to a vacuum port on the intake manifold. Connect the Teensy to a power source (regulated 5V or battery voltage via a voltage regulator). Add a relay for the fuel pump and injector driver circuit (the Teensy can handle the injector directly if using a low-impedance injector with a resistor, or use a dedicated driver). Upload the firmware from the GitHub repository and test sensor readings.
5. Initial Tuning and Startup
With the engine off, prime the fuel system and check for leaks. Set the base fuel map using rough estimates based on engine displacement and injector size. Crank the engine and watch for start-up. Adjust the pulse width and timing until the engine runs smoothly. Tuning is iterative; data logging helps refine the tables.
What You Learn from This Build
Undertaking an EFI conversion teaches valuable lessons in mechanical design, electronics, and engine thermodynamics. You gain an intimate understanding of how air-fuel ratio, ignition timing, and engine speed interact. The project also forces you to troubleshoot wiring and sensor issues, skills applicable to automotive and robotics projects.
Resources and Community Support
[Carlos Takeshita] has made all design files and software available on GitHub. Enthusiasts can download the schematics, PCB layouts, and calibration files. Online forums and social media groups dedicated to small engine EFI offer additional help. For similar builds, see our previous coverage of DIY EFI on lawnmowers and generators.
Conclusion: A Rewarding Challenge
Converting a small engine to electronic fuel injection is not a weekend project, but the payoff is immense: better fuel economy, smoother idle, and the satisfaction of building a custom engine management system from scratch. Whether you use a Predator 212 or another single-cylinder engine, the principles remain the same. With careful planning and a willingness to learn, you can bring your small engine into the EFI era.